Home » Posts tagged 'air conditioning repair'
Tag Archives: air conditioning repair
When It’s Time for AC Repair or Replacement
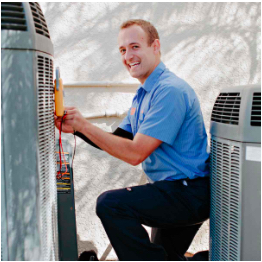 When your air conditioner isn’t working properly, it may be time to call for Air Conditioning Repair Van Nuys. Keeping your AC unit well-maintained can extend its life expectancy and improve performance.
Before calling for an AC repair, check to ensure the unit is powered up and has power at the thermostat and disconnect switch. Also, inspect the electrical conduits for rodent activity and reseal any open areas.
The evaporator coil is responsible for cooling the air in your home, but it needs a clean surface to work effectively. Over time, the coil can become covered with dirt and debris, which reduces its ability to absorb heat. If this is not removed regularly, you can expect to see problems with your system.
The coil can collect a lot of debris, including grass clippings, sand, pet hair, tobacco smoke, and rust. In addition, it can become infested with mildew and mold. These can create foul odors that are circulated throughout the house. They can also cause the air conditioner to turn on and off repeatedly, which is very expensive for your utility bills.
Dirty evaporator coils can cause a number of other issues with your AC unit. As the coil becomes dirty, it loses its ability to absorb heat, which cuts down on overall energy efficiency. This can lead to a rise in your utility bills and cause the system to run longer to reach the desired temperature. When the evaporator coil is too dirty, it can also prevent the thermostat from properly sensing when the room has reached the desired temperature and signaling the system to stop.
Your evaporator coil can also become damaged when it’s exposed to extreme temperatures. If the coil is exposed to excessive temperatures, it may degrade or even melt. This can cause severe damage to the air conditioning unit and require an expensive repair or replacement.
If you’re concerned about your evaporator coil becoming too dirty, consider using an air conditioner maintenance service that will clean the coil each month. These services usually include a check of the air filter as well as the evaporator and condenser coils.
Getting the evaporator coil clean is easy enough, but it’s important to make sure that the power to your air conditioning unit is off before you attempt any work. It’s also helpful to have an air conditioner expert show you where the coil is located and how to access it safely. You can use a soft brush to remove light amounts of dirt, but it’s best to have a professional perform any deep cleaning.
Refrigerant Leak
A refrigerant leak is a big deal and one that should be dealt with quickly. Refrigerant is a chemical substance that helps your AC unit perform cooling functions, and when there’s a leak, it’ll need to work harder to cool the air. This can drive up your energy bills. The best way to find a refrigerant leak is with either a special sniffer or by performing a simple soap bubble test on your evaporator coil. A bubble will form if the refrigerant is present, and it’s easy to see where the leak is located from there.
Leaks can also cause serious damage to your system if not handled promptly. They will eventually deplete the compressor of its oil, leading to a major repair that’s usually very expensive. In addition to this, a refrigerant leak will create hazardous fumes. Inhaling these can lead to dizziness, loss of coordination and concentration, and skin rashes. The worst-case scenario is that you could suffer from seizures and even lose consciousness if the leak is severe enough.
Another sign of a refrigerant leak is if you notice puddles on the ground near your unit. These puddles are usually caused by condensation that melts on the evaporator coil and drops to the floor. Larger leaks will produce a hissing sound as they escape.
You’ll want to call a professional air conditioning repair company as soon as you suspect you have a refrigerant leak. Some companies may try to cut corners by simply charging your air conditioner for a refill of refrigerant, but this is a dangerous solution. Refrigerant is escalating in price, and if you have to keep recharging, it will likely lead to the depletion of the compressor’s oil and result in an even more costly repair or replacement.
Additionally, working on your own AC system can void the warranty and possibly lead to more damage and serious consequences than just a refrigerant leak. It’s always wise to leave these tasks to professionals who have been certified by the industry. This will ensure that any future issues are properly diagnosed and repaired.
Dirty Condenser Fan
You may have heard the expression “dirt is cheap.” However, when it comes to your air conditioning unit’s condenser coils and fan, it’s a different story. Dirty coils prevent your AC from rejecting heat from the house, which in turn reduces cooling capacity. The condenser is filled with refrigerant, which takes excess heat and sends it outdoors to lower the indoor temperature. A dirty condenser coil keeps heat from escaping, forcing your AC to run longer and increasing energy bills.
In addition, a dirty condenser coil can damage the fan motor by overworking it. It can also attract colonies of bacteria and fungi, which can then release harmful spores into your home’s indoor air supply.
To prevent a dirty coil, regularly clean the outdoor unit’s fan blades and the surrounding area. Keep bushes and other plants at least three feet away from the unit, and make sure there’s plenty of room for airflow around the coil. Also, schedule regular maintenance with an air conditioning service company to ensure that your coils are free of dirt and other debris.
Your air conditioner has two coils: an evaporator coil and a condenser coil. While you can try to clean the evaporator coil yourself, it’s best to leave cleaning the condenser coil to an experienced professional. The professional can inspect your unit and make sure the fan, condenser coil, and surrounding areas are free of obstructions that could affect its performance.
If you suspect that your air conditioner’s condenser coil is dirty, shut off the circuit breaker and furnace switch, then remove the cover and disconnect the wires leading to the capacitor. Take a photo of the capacitor to note its size, make, and model (or just jot down the serial number). Purchase a replacement capacitor with similar specs from an appliance store or a furnace dealer. During installation, use needle-nose pliers to gently pull one wire at a time from the old capacitor and snap it onto the corresponding tab on the new one.
The capacitor stores electricity and releases it during compressor and fan startup to give them an extra jolt of power and smooth out voltage fluctuations that can otherwise cause electrical damage. When you replace the capacitor, remember to ground it by connecting its negative terminal to the metal case on the air conditioner’s chassis.
Faulty Thermostat
A thermostat has one simple job: to open and close the flow of coolant between an engine and radiator. But if this vital component goes bad, the consequences can be serious. Fortunately, there are a few telltale signs that you need to get your thermostat replaced as soon as possible.
A thermostat that erratically switches from hot to cold is the most common sign of a problem. This means the unit is not responding to the temperature setting and will switch back and forth, often with extreme changes in temperature. It can also indicate a problem with the thermostat wiring.
Another indicator of a bad thermostat is when the display reads a different temperature than what it feels like in the room. While minor fluctuations are normal, a big difference could mean the thermostat is not correctly calibrated or the wiring is damaged. A professional technician should check the wiring for damage and calibration.
If your HVAC system is running constantly, it may be because the thermostat has stopped sending signals to turn it off. This can cause the system to run indefinitely and lead to a spike in energy costs. A professional technician will look at the thermostat as well as the system’s electrical panel to figure out what’s causing it to stay on.
When a vehicle’s thermostat is stuck in the closed position, it can prevent coolant from flowing through the radiator and even cause the engine to overheat. This is a clear indication that it’s time to replace the thermostat and top off the engine’s coolant reservoir.
The thermostat should be easy to find, usually located near the upper radiator hose. It should be fastened with two or three 10 mm or 12 mm bolts and be easily removed. Once the bolts are free, it’s a good idea to use a plastic scraper to clean off any rust or corrosion from the mounting surface. This will help ensure that the new thermostat is seated properly and doesn’t leak.